Bright, buttery lemon bars that slice clean and sparkle with real citrus. Master the simple steps now and serve bakery-fresh squares that disappear fast.
Table of Contents
Lemon bars bring pure sunshine to the dessert table. A crisp, buttery shortbread base holds a silky lemon filling that sets clean and slices sharp, bright in every bite. In a few simple steps, you will master doneness cues, get precise US and metric weights, and learn smart storage and freezing so your lemon bars stay bakery fresh every time.
Lemon Bars Uncovered, Podcast with Chef
Zesty, tangy, and unapologetically bold, lemon bars aren’t just a dessert, they’re a balance of science and soul. In this episode, Mia and Chef break down citrus chemistry, the art of silky lemon curd, and the secrets behind a clean, slice perfect bar. If you love dessert with depth, this one’s for you.
What Makes These Lemon Bars Stand Out
Balanced, bright flavor
Fresh lemon juice and fine zest deliver vivid citrus while a pinch of salt keeps this lemon bars dessert lively, not overly sweet.
A shortbread base that stays crisp
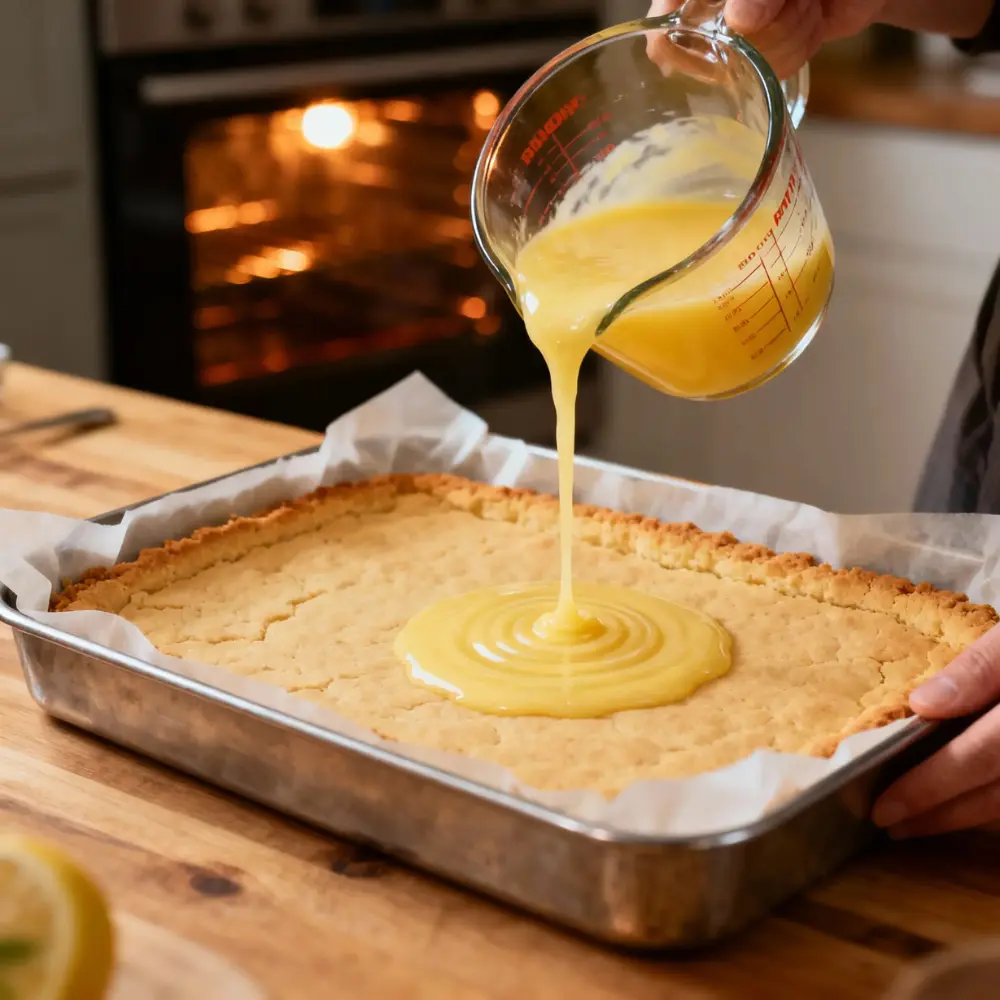
Line the pan, prebake to light gold, then pour the filling over the hot crust so the bottom stays firm and the squares slice clean.
Silky filling, mixed gently
Whisk just until smooth to avoid bubbles. The result is a custardy lemon bars texture that sets evenly and looks glossy, not airy.
Doneness cues you can trust
Bake until the top looks set and matte and the center no longer jiggles. If you use a thermometer, aim about 160 to 170°F in the center.
Clean slices and a lasting finish
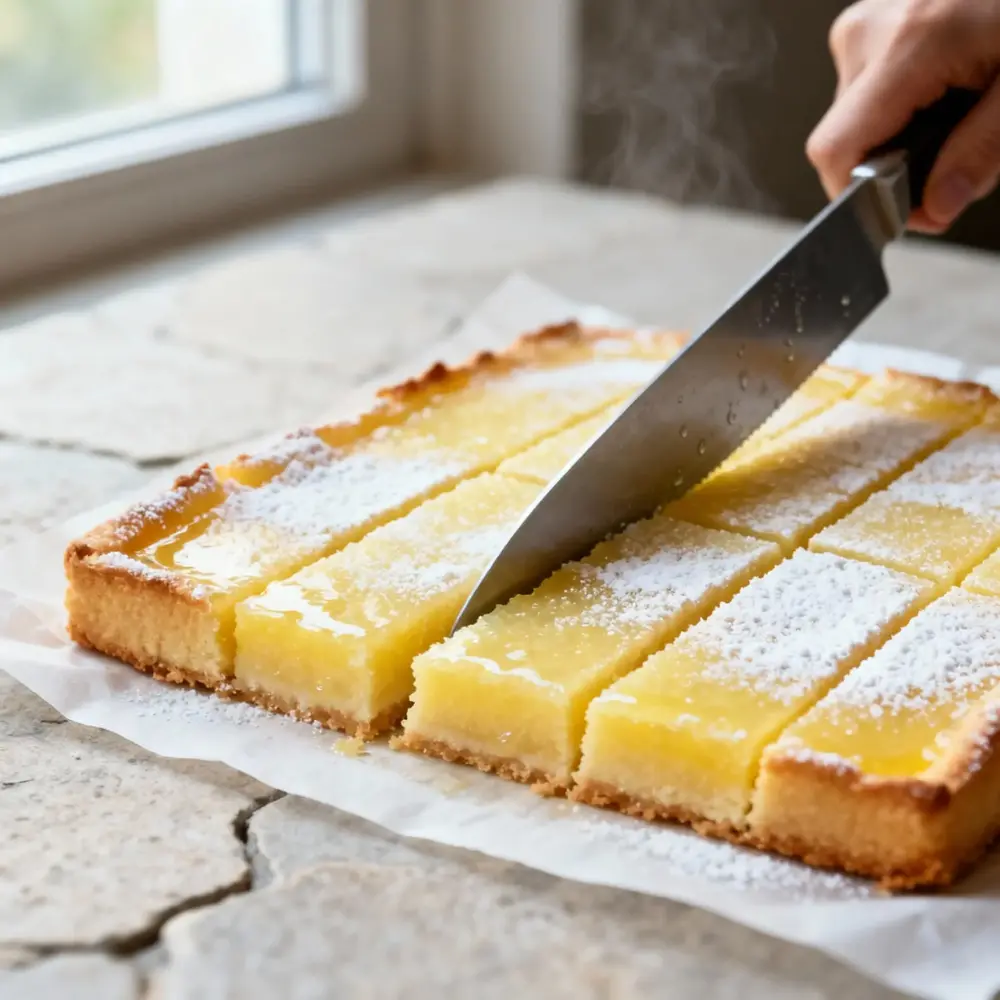
Cool to room temperature, chill before cutting, and wipe a warm knife between cuts. Dust with powdered sugar right before serving for a bakery look that holds.
Quick Facts
- Difficulty: Easy
- Prep Time: 10 minutes
- Cook Time: 40 minutes
- Chill Time: 1 hour
- Total Time: About 1 hour 50 minutes
- Yield: 16 to 24 squares
- Pan Size: 9×13 inch
- Storage: Refrigerate up to 4 days or freeze up to 3 months
Nutrition Snapshot
Approximate values per square (based on 20 servings):
- Calories: 220
- Total Fat: 10 g
- Saturated Fat: 6 g
- Carbohydrates: 30 g
- Sugars: 22 g
- Protein: 3 g
- Cholesterol: 65 mg
- Sodium: 80 mg
These numbers may vary slightly depending on ingredient brands and portion size.
Ingredients, Measured Like a Pro
Getting the amounts right is what makes Lemon Bars shine. This lemon bars dessert lists both US and metric measurements so your lemon bars recipe bakes perfectly every time.
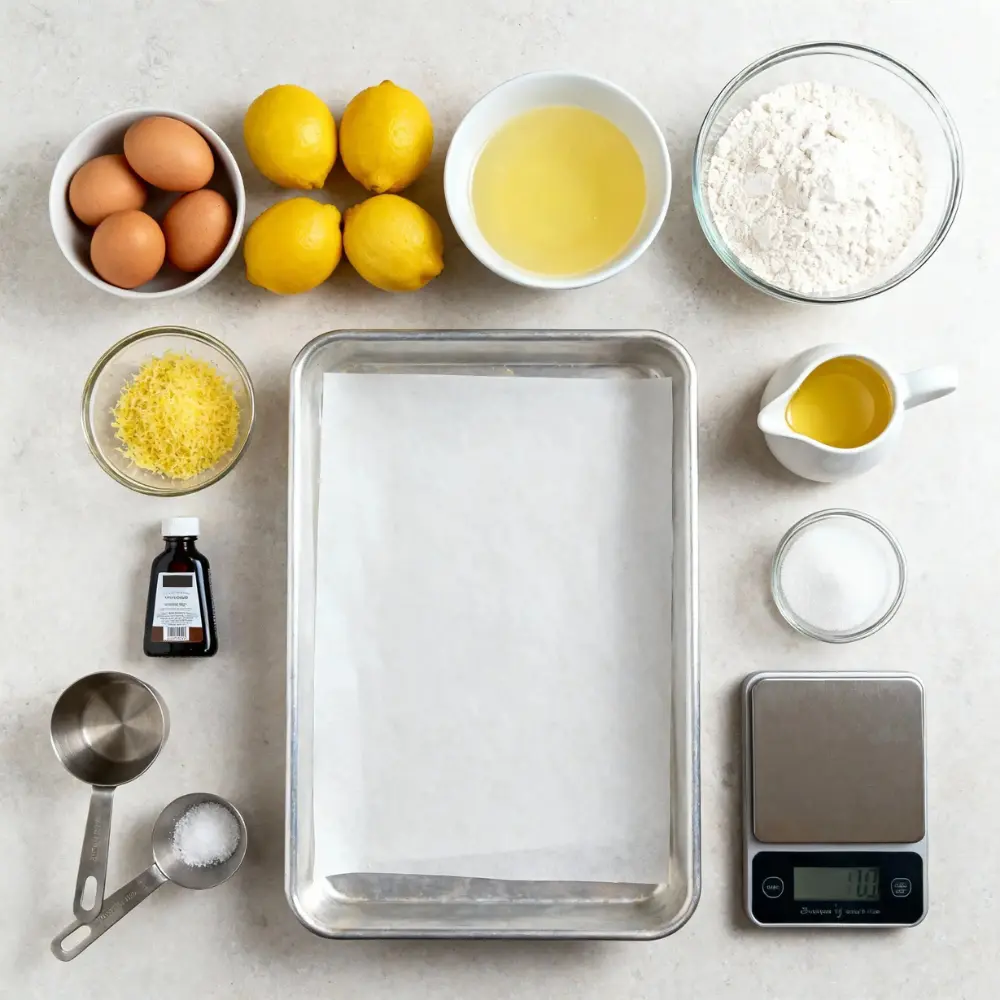
Shortbread Crust
• 1 cup (226 g) unsalted butter, melted
• 2 cups (250 g) all-purpose flour
• ½ cup (100 g) granulated sugar
• ¼ teaspoon salt
• 1 teaspoon vanilla extract
Lemon Filling
• 4 large eggs
• 1½ cups (300 g) granulated sugar
• ¼ cup (30 g) all-purpose flour
• ½ cup (120 ml) fresh lemon juice (about 3–4 lemons)
• 1 tablespoon lemon zest
• Powdered sugar for dusting
Smart Substitutions That Work
• Use 1 tablespoon cornstarch in place of 1 tablespoon flour for a firmer set.
• Swap butter for the same weight of dairy-free baking butter for a lactose-free version.
• For gluten-free, replace the crust flour with fine almond flour and watch the edges as they brown faster. You can also explore more Gluten and Dairy-Free Desserts for ideas that suit different dietary needs while keeping flavor and texture in focus.
From Pan to Perfect Squares
This is where your Lemon Bars turn from a simple mix into a bakery-level dessert. Follow these clear steps to get that glossy top, tender crust, and smooth, even lemon filling that every lemon bars dessert lover wants.
Prep and Pan Lining
Line a 9×13-inch pan with parchment paper, leaving a small overhang for easy lifting. A clean lift means your lemon bars recipe will slice neatly without breaking the crust.
Prebake the Crust
Press the dough evenly into the pan and bake at 350°F (175°C) for 18–20 minutes until lightly golden. This step keeps the base crisp and prevents sogginess once the filling is added.
Whisk the Filling Smoothly
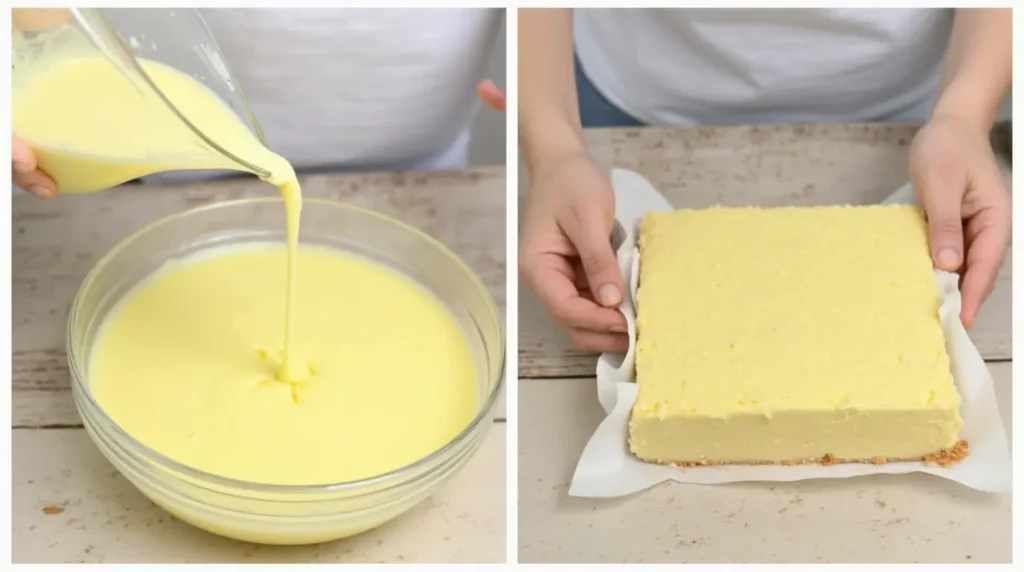
Whisk eggs, sugar, flour, lemon juice, and zest just until blended. Overwhisking traps air and can cause bubbles or cracks, so mix gently for a silky finish.
Pour Over the Hot Crust
While the crust is still hot, pour in the lemon filling. The heat helps the layers bond together, giving each slice that perfect edge and balanced texture.
Bake Until Set
Return to the oven for 20–22 minutes. The Lemon Bars are ready when the top looks matte and the center no longer jiggles. If you want precision, aim for about 160 to 170°F (70 to 75°C) in the center.
Cool and Chill Before Slicing
Cool completely, then chill for at least 1 hour before cutting. A chilled dessert cuts cleaner and holds its shape beautifully. Use a sharp, warm knife and wipe between cuts for bakery-style squares.
Chef Tip
Before you start, bring your eggs and butter to room temperature. Warm ingredients blend more smoothly, giving your Lemon Bars a creamy filling and a crust that presses evenly without cracking. This simple step makes the whole lemon bars dessert bake evenly from edge to center.
Pans, Yields, and Smart Scaling
Every baker’s kitchen is different, but your Lemon Bars should always bake evenly and slice clean no matter the pan you use. Understanding size, yield, and scaling helps you get consistent results every time you make this lemon bars dessert.
Standard Pan Size
A 9×13-inch metal baking pan gives the best results for most Lemon Bars recipes. Metal conducts heat evenly, helping the crust stay crisp while the filling sets smoothly. If you use glass, reduce the oven temperature by about 15°F and watch closely near the end, since glass retains heat longer.
Yield and Serving Size
A full 9×13 batch makes about 24 squares if cut small or 16 large bakery-style bars. For parties or bake sales, smaller cuts keep them neat and easier to serve. Always chill before cutting to prevent tearing the edges.
Scaling for Smaller Batches
To bake a half batch, use an 8×8-inch or 9×9-inch pan and cut all ingredients in half. Start checking for doneness 3–4 minutes earlier since smaller pans set faster. For thicker, custard-like Lemon Bars, use the 8×8 size but keep the full amount of filling for an extra rich layer.
High Altitude and Oven Variations
At higher elevations, reduce sugar by about 2 tablespoons and increase baking time slightly to help the filling set properly. Always test your oven temperature with a thermometer, because even a small variation can change how your lemon bars recipe turns out.
Pro Tip
If you switch pan sizes, always adjust both the baking time and the cooling time. Smaller pans (like 8×8) make thicker Lemon Bars and need a few extra minutes to set fully, while larger pans bake faster and cool quicker. This small timing tweak keeps your lemon bars recipe consistent and perfectly textured every time.
Make-Ahead, Fridge, and Freezer Game Plan
Lemon Bars are the kind of dessert that stay delicious for days if you handle storage correctly. This section helps you plan ahead so your lemon bars dessert tastes as fresh as the day you baked it.
Make-Ahead Tips
You can make Lemon Bars one or two days before serving. After baking, let them cool completely, then cover tightly and refrigerate. The flavor deepens slightly overnight, giving your lemon bars recipe an even brighter lemon taste the next day. If you’re looking for a cozy, seasonal option to prep ahead as well, the Pumpkin Spice Cake with Caramel Drizzle is rich, warm and ideal for fall gatherings.
Refrigeration
Because the filling contains eggs, Lemon Bars should always be stored in the refrigerator. Keep them in an airtight container for up to four days. Add powdered sugar right before serving, since it can dissolve after a few hours in the fridge.
Freezing Made Simple
To freeze, chill the bars first until firm. Cut into squares, place them on a tray in a single layer, and freeze for about an hour. Once frozen, move the pieces to a sealed freezer-safe container with parchment between layers. They will keep for about three months. Thaw in the refrigerator before serving and dust again with sugar for a fresh look.
Serving After Storage
Cold Lemon Bars slice best and hold their shape longer. If you prefer a softer texture, let them sit at room temperature for 10 to 15 minutes before serving. Either way, your lemon bars dessert will stay bright, firm and bakery-quality. For a cozy pairing, consider serving them with a slice of Apple Cider Coffee Cake that adds a warm, spiced contrast to the citrus flavor.
Doneness, Texture, and the Clean-Slice Test
Perfect Lemon Bars are all about timing and texture. The right bake creates a silky filling that sets just enough to slice cleanly while keeping that fresh, citrusy bite that defines every good lemon bars dessert.
Signs Your Lemon Bars Are Done
Look for a soft matte surface and a center that no longer jiggles when the pan moves gently. The color should stay pale yellow, not brown. If you use a thermometer, aim for about 160 to 170°F in the center for the ideal set.
What Perfect Texture Feels Like
The filling should be smooth and slightly firm when chilled but melt on the tongue as it warms. A good lemon bars recipe gives a contrast between the crisp crust and the creamy layer on top. If you enjoy that kind of bright citrus balance, the Lemon Blueberry Dump Cake offers a similarly easy dessert with juicy blueberries and a soft lemony base.
Cooling for Best Results
Cool the pan at room temperature for 30 minutes, then refrigerate at least one hour before cutting. This step allows the filling to tighten slightly, so the layers hold when sliced.
The Clean-Slice Method
For professional looking squares, use a long, sharp knife dipped in hot water and wiped dry before each cut. Lift the bars using the parchment paper edges, trim the sides for even edges, then cut into neat squares.
Fix It Fast, Common Lemon Bar Problems
Even experienced bakers run into small issues when making Lemon Bars. This part shows how to recognize and fix common problems so your lemon bars dessert always comes out smooth, firm, and photo-ready.
Rubbery or Overcooked Texture
If the filling feels rubbery or dense, it was likely overbaked. Lemon juice acidity helps the custard set properly. Its role in structure is explained in this scientific article from the National Library of Medicine. Remove the bars when the top looks matte and the center is just slightly soft.
Soggy or Weak Crust
A soggy base happens when the crust was underbaked or the filling sat too long before baking. Always prebake until the edges turn light gold, and pour the filling over the crust while it is still warm. A metal pan also helps the crust stay crisp.
Powdered Sugar Melting or Disappearing
Powdered sugar absorbs moisture and can vanish quickly, especially in humid air. For best presentation, dust right before serving or use a non-melting topping sugar that stays visible longer on moist desserts.
Bars That Are Too Tart or Too Sweet
If the flavor feels unbalanced, you can adjust easily next time. Add a teaspoon of extra sugar if too tart or reduce the lemon juice slightly. For too sweet, add a pinch of salt or increase the zest for a brighter lemon flavor that cuts through the sweetness.
Flavor Twists People Actually Make
Small, smart changes keep your Lemon Bars fresh and memorable. These twists use the same base method, so your lemon bars dessert stays reliable while the flavor shifts in a fun way. For another fruity surprise, try the Strawberry Brownies Recipe. It’s chewy, berry-packed and just as easy to love.
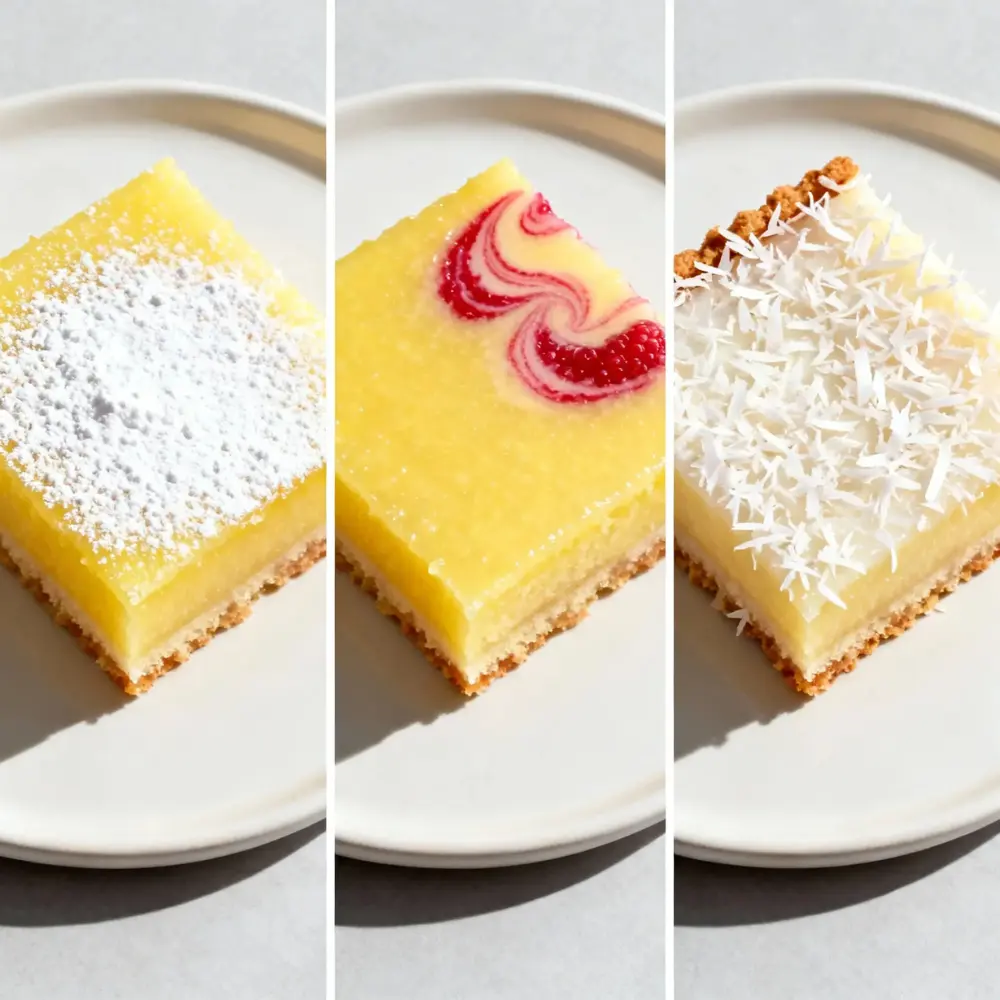
Extra Lemony
Add 1 more tablespoon fine zest and replace 1 tablespoon of the sugar with 1 tablespoon lemon juice. The filling tastes brighter and still sets clean like a classic lemon bars recipe.
Raspberry Swirl
Blend ½ cup fresh raspberries with 1 teaspoon sugar, then strain. Pour the lemon filling, add small spoonfuls of puree on top, and drag a skewer for a light swirl. Bake as usual for a sweet tart contrast.
Coconut Kiss
Stir ½ cup finely shredded unsweetened coconut into the crust mixture, and swap 2 tablespoons of the butter with coconut oil. The base gets aromatic and slightly chewier while the top stays silky. Lemon juice, however, remains key to the structure and balance of the filling. The University of Georgia explains how lemon juice affects fruit-based desserts, especially in stability and preservation.
Gluten Free Shortbread
Use 2 cups fine almond flour, ¼ cup sugar, ¼ teaspoon salt, and 6 tablespoons melted butter. Press firmly, prebake to light gold, then proceed with the lemon filling. Slice once fully chilled for the cleanest edges.
Serve It Like a Bakery
Presentation turns good Lemon Bars into a show-stopping lemon bars dessert. Simple tricks make each square look polished and tempting while keeping the flavor pure and fresh.
Simple Add-Ons
Add a light dusting of powdered sugar or a thin drizzle of vanilla glaze right before serving. A few fresh berries or a small mint leaf brighten the plate without stealing the spotlight.
For Special Occasions
Cut the bars into triangles or bite-size squares and arrange them on a tiered tray. Pair with tea, coffee or sparkling water with a lemon twist for an elegant finish that feels bakery-made. For something equally pretty and no-bake, the Strawberry Lasagna Dessert layers cream, fruit and cookie crust into a chilled treat that stands out on any dessert table.
Clean Slicing Tips
Chill the pan well, then use a sharp knife warmed in hot water and wiped dry. Slice straight down, not in a sawing motion, and clean the blade between cuts. Each square will have crisp edges and a glossy top that holds beautifully.
Top 4 Frequently Asked Questions
How do I know when Lemon Bars are done
Bake until the surface looks set and matte and the center no longer jiggles when the pan moves gently. If you use a thermometer, aim about 160 to 170°F in the center.
Can I freeze Lemon Bars
Yes. Chill until firm, cut into squares, freeze in a single layer, then pack airtight with parchment between layers. Thaw in the fridge and dust with sugar before serving.
Why did my Lemon Bars turn rubbery
They were overbaked or the oven ran hot. Pull them as soon as the top is set with no center jiggle, and verify oven temperature with a thermometer.
Do Lemon Bars need to be refrigerated
Yes. Because the filling contains eggs, store Lemon Bars covered in the refrigerator for about 3 to 4 days.
Chef Notes160–170°F
Zest first, then juice
Zest the lemons before juicing to capture fragrant oils. This simple step makes Lemon Bars brighter without extra sugar and keeps your lemon bars dessert lively.
Hot crust, silky filling
Prebake the shortbread to light gold, then pour the filling over the crust while it is still hot. The layers bond cleanly so your lemon bars recipe sets smooth and slices neatly.
Set, chill, slice clean
Bake until the top looks set and matte and the center no longer jiggles. Cool to room temperature, chill for clean edges, then cut with a warm dry knife for bakery style squares.

